The dream of a perfect home theater isn't just about the biggest screen or the most immersive sound; it’s also about an unseen, yet critical, component: Home Theater Ventilation Solutions. Without proper airflow, your cinematic sanctuary quickly becomes a stuffy, noisy oven, shortening the lifespan of your expensive gear and diminishing the magic of movie night. Effective ventilation isn't an afterthought; it's the cornerstone of optimal comfort, performance, and equipment longevity.
At a Glance: Key Takeaways for Home Theater Ventilation
- Why it's essential: Prevents equipment overheating, ensures viewer comfort, maintains pristine sound quality, and improves indoor air quality.
- Two main approaches: Dedicated equipment cooling for your AV components (receivers, amplifiers) and integrated whole-room HVAC design for ambient temperature and fresh air.
- Critical factors for equipment fans: Airflow capacity (CFM), ultra-low noise levels (dBA), space compatibility (rack mount, cabinet), and ease of installation.
- Key principles for room HVAC: Quiet operation, an independent dedicated system, excellent indoor air quality (IAQ) with fresh air exchange, and seamless integration with your theater's design.
- Don't rely on guesswork: Proper sizing, strategic component placement, and thoughtful ductwork design are crucial for both aspects.
The Unseen Enemy: Why Heat and Stale Air Threaten Your Home Theater
You've invested in a state-of-the-art projector, a powerful receiver, and maybe even a custom media server. These aren't just pieces of electronics; they're the heart and soul of your entertainment experience. But like any high-performance machine, they generate heat—a lot of it. Add in a few eager viewers, sealed doors, and plush furnishings, and you’ve got a recipe for discomfort and potential disaster.
1. The Silent Killer: Overheating Electronics
Your high-performance audio/video (AV) gear generates substantial heat. Amplifiers, receivers, projectors, game consoles, and media servers are essentially mini-furnaces. Without adequate cooling, this heat builds up, leading to:
- Reduced Lifespan: Components degrade faster when constantly exposed to high temperatures. This means more frequent repairs or premature replacement of expensive equipment.
- Performance Throttling: Some devices will automatically reduce their performance to prevent damage, leading to dropped frames, audio cut-outs, or system shutdowns.
- Unreliable Operation: Intermittent glitches, unexpected reboots, or complete system failures can often be traced back to thermal stress.
2. The Comfort Compromise: Stuffy Rooms and Distracted Viewers
Imagine settling in for a blockbuster, only to find the air thick, humid, and increasingly warm. A stuffy environment detracts from the immersive experience, making viewers restless and less engaged. High ambient temperatures affect:
- Viewer Enjoyment: Sweating, fidgeting, and frequent breaks for fresh air break the spell of the silver screen.
- Health and Well-being: Poor ventilation can lead to stale air, increased humidity, and potential issues with mold or mildew, impacting air quality.
3. The Audio Assassin: Fan Noise and Unwanted Distractions
Ventilation often conjures images of loud, whirring fans. While necessary, poorly chosen or installed fans can introduce disruptive noise into your meticulously calibrated soundstage. The goal is silent operation, where the only sounds you hear are those intended by the filmmakers.
Pillar One: Precision Cooling for Your Precious Gear (Equipment Ventilation)
Your AV components need their own dedicated cooling strategy. This isn't just about blowing air; it's about intelligent airflow management that protects your investment without introducing noise.
Understanding the Heat Producers in Your Rack or Cabinet
Before you choose a ventilation solution, identify the main culprits:
- Power Amplifiers/Receivers: These are typically the biggest heat generators, especially multi-channel units pushed hard.
- Projectors: Lamps (or lasers) and processing units produce significant heat.
- Media Servers/PCs: Hard drives and processors inside these units can run hot.
- Game Consoles: Especially during intense gaming sessions.
- Network Switches/Routers: Can generate surprising amounts of heat in confined spaces.
The strategy is simple: draw in cooler air from the front or bottom of a cabinet/rack and exhaust the hot air out the back, top, or side.
Key Selection Factors for Equipment Ventilation Kits
Choosing the right equipment cooling system involves balancing performance, noise, and integration.
1. Airflow Capacity (CFM)
CFM, or Cubic Feet per Minute, measures the volume of air a fan moves. This is arguably the most critical factor for effective cooling.
- The Right Range: Kits typically range from 20 to 300 CFM. Small, single components might need 20-50 CFM, while a fully loaded rack with multiple amplifiers could demand 200 CFM or more.
- Match to Heat Output: High-performance devices like powerful amplifiers require higher CFM. Don't undersize!
- Strategic Airflow: Optimize by having dedicated intake and exhaust points. For example, a fan pulling cool air into the bottom of a cabinet and another expelling hot air from the top. Multiple fans might be necessary for larger setups.
2. Noise Level (dBA)
In a home theater, silence is golden. Any fan noise above a whisper will detract from your audio experience.
- Aim for the Lowest: Target 19 dBA or lower. Anything above 30 dBA will be noticeable and disruptive. Some premium fans can achieve as low as 8 dBA.
- Dual-Ball Bearings: Look for fans with dual-ball bearings; they're quieter, more durable, and typically last over 60,000 hours (about 7 years of continuous operation).
- Multi-Speed Controllers: These are invaluable. They allow you to adjust fan speed based on actual cooling needs, minimizing noise when components are idle or running cooler.
3. Space Size & Layout Compatibility
Ventilation kits come in various forms to fit different setups.
- Rack Mount: Standardized 1U or 2U panels fit directly into AV racks. Measure your available rack units.
- Cabinet Mount: Fans designed to be cut into cabinet doors, side panels, or shelves. Measure available mounting space.
- Component Specific: Smaller fans that sit directly on top of or behind individual components.
- Installation Height/Orientation: Consider how the fan will draw in and expel air efficiently. Hot air rises, so exhaust fans at the top are often ideal.
4. Power Supply Options
Convenience and energy efficiency matter.
- Standard Wall Outlets: Common for larger kits.
- USB Ports: Ideal for smaller fans cooling individual components or for use with devices that have available USB power.
- Low Voltage (12V DC): Often used for quieter fans and can be integrated into custom systems.
- Energy-Saving Settings: Look for features like automated on/off based on temperature or programmable schedules.
5. Installation Complexity
How much DIY are you comfortable with?
- Plug-and-Play: Many kits are simple, requiring basic mounting hardware and a power connection.
- Moderate DIY: Some require cutting holes in cabinet panels (with templates usually provided).
- Programmable Features: While enhancing control, these might involve slightly more complex setup, but the benefit usually outweighs the initial effort.
6. Equipment Compatibility
Smart features can make your ventilation system truly set-and-forget.
- Programmable Thermostats: Fans automatically turn on/off or adjust speed based on a set temperature threshold.
- Automated Speed Controls: React to temperature fluctuations, ensuring optimal cooling without constant manual adjustments.
- Alarm Alerts: Some advanced systems can alert you if temperatures reach critical levels.
7. Design & Aesthetics
Your home theater is a showpiece; your ventilation should blend seamlessly.
- Materials: Anodized aluminum and heavy-duty steel are common for durability and a premium look.
- Finish: Brushed black, silver, or other finishes that match your existing AV gear or cabinet.
- Fan Grills: Discreet grills or spirals protect components and fingers while maintaining airflow.
8. Durability
You want a system that lasts as long as your components.
- Premium Materials: Heavy-duty aluminum frames, robust steel construction.
- Long-Lasting Bearings: Dual ball bearings offer superior longevity (e.g., 67,000 hours) compared to sleeve bearings.
- High Temperature Tolerance: Units should be rated to handle the heat they're designed to manage (e.g., up to 230°F).
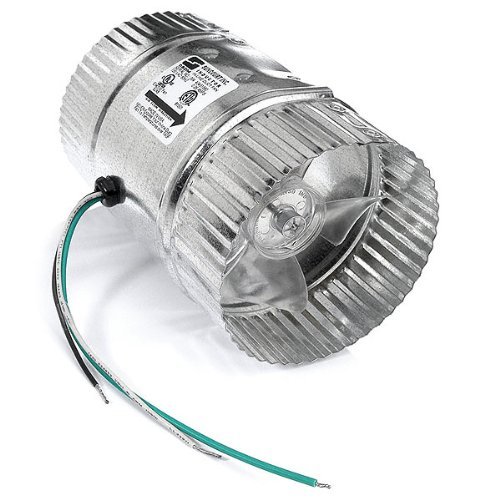
Recommended Home Theater Equipment Ventilation Kits (Examples)
While specific product availability can change, here are common types and examples that illustrate the features discussed:
- Cabinet & Component Fans:
- AC Infinity AIRPLATE S1 Quiet Cooling Fan System: Compact, quiet (17 dBA, 26 CFM), often USB or wall-powered, great for individual components or small cabinet areas.
- SCCCF USB 120MM Quiet Cooling Fan System: USB powered, multi-speed, good for focused cooling.
- Rack Mount Fan Panels:
- AC Infinity CLOUDPLATE T7-N Rack Mount Fan Panel 2U: High capacity (up to 220 CFM), intelligent thermostat, premium aluminum, multiple fans for even distribution.
- AC Infinity CLOUDPLATE T2 Rack Mount Fan (1U): Adjustable airflow (60-300 CFM), programmable thermostat, compact 1U design.
- AEONS Quiet Wall Mount Cabinet Server Rack Cooling Fan System: Heavy-duty, for standard 19” racks.
- Roof/Rear Rack Fans:
- AC Infinity Rack ROOF Fan KIT: Mounts on top of a standard 19” rack, powerful (200 CFM), durable steel, PWM speed controller.
- Blower Systems:
- AC Infinity AIRCOM T10 Quiet Cooling Blower Fan System: Designed for larger AV receivers, front exhaust, intelligent LCD thermostat, alarm alerts.
- DIY/Custom Kits:
- Coolerguys PRO-Metal Cabcool1201-5M Lite Single 120mm Cooling Kit: A versatile kit for custom cabinet installations, durable, easy to install.
- CabCool 802 Lite Dual 80mm Fan Cooling Kit: Offers configurable fan direction (in/out), useful for specific airflow needs.
For a deeper dive into optimizing your setup, exploring everything from component placement to acoustic considerations, you might find Everything about HD holed especially insightful.
Pillar Two: The Breath of Life – Whole-Room HVAC Design for Home Theaters
Beyond cooling individual components, the overall climate control of your home theater room is paramount. This involves a dedicated HVAC (Heating, Ventilation, and Air Conditioning) system designed specifically for the unique demands of a sealed, high-occupancy space with significant heat loads.
Goals Beyond Just Temperature Control
A standard residential HVAC system simply won't cut it for a dedicated home theater. Your goals must be more ambitious:
1. Quiet by Design
The HVAC system itself cannot be a source of noise.
- Low Air Velocity: Ductwork must be large enough to allow air to move slowly, minimizing whooshing sounds.
- Internal Duct Lining: Acoustically lined ductwork absorbs sound, preventing fan noise from traveling into the room and reducing air turbulence noise.
- Strategic Duct Turns: Multiple bends in ductwork naturally dissipate sound energy.
- Low Operating Pressure & Variable Speed Motors: Equipment (air handlers, compressors) should operate quietly with variable speed motors to prevent abrupt, noisy starts and stops.
2. An Independent System
Sharing HVAC with the rest of your home is a recipe for problems.
- Quick Response to Demand: A dedicated system can quickly adjust to the fluctuating heat load of equipment and occupants.
- Eliminates Sound Leakage: No shared ductwork means no sound from other parts of the house (or the HVAC unit itself) leaking into the theater.
- Lower Operating Costs (when idle): The dedicated system only runs when the theater is in use.
- Year-Round Cooling Capability: Crucial for managing equipment heat even during cooler outdoor conditions.
3. Optimal Indoor Air Quality (IAQ)
A sealed room with multiple occupants can quickly become stuffy and oxygen-depleted.
- Fresh Air Introduction: Aim for 4-6 air changes per hour (ACH) of fresh, filtered outdoor air, with 6 ACH recommended for maximum occupancy.
- Heat/Energy Recovery: Consider a Heat Recovery Ventilator (HRV) or Energy Recovery Ventilator (ERV) to introduce fresh air while pre-conditioning it and recovering energy from the exhaust air.
4. Seamless Integration
The HVAC design must complement your sound design and aesthetic vision.
- Acoustic Transparency: Registers and grilles must be designed and placed to not reflect sound or create unwanted acoustic anomalies.
- Visual Discretion: Components and ductwork should be hidden or integrated tastefully.
Achieving Home Theater HVAC Excellence
Here’s how to build a superior climate control system for your theater:
1. Precise Unit Sizing
Forget the standard BTU/square foot calculations. For a home theater, you must size based on:
- Occupancy: Each person generates significant heat.
- Equipment Heat Loads: Sum the BTU output of all AV components, including projectors.
- Lighting Loads: Recessed lighting, sconces, etc., contribute to heat.
- Fresh Air Load: The additional heating/cooling required to condition incoming fresh air.
2. Strategic Equipment Choices
- Separate System: A dedicated heating and cooling system is a must.
- Variable Speed Indoor Blowers: Provide tailored airflow, allowing for slower, quieter fan speeds and soft start ramp-ups.
- Oversized Air Handler: A slightly oversized air handler can operate at lower, quieter fan speeds while still delivering adequate airflow.
- Multiple Speed Compressors or Variable Refrigerant Volume (VRV) Units: These systems can modulate their output, providing consistent temperature control without abrupt on/off cycles, which are both noisy and inefficient.
- Heat Pumps: Utilizing VRV technology, heat pumps offer soft, quiet heating and cooling, ideal for a theater.
3. The All-Important Site Survey (Especially for Renovations)
Before any construction begins, conduct a thorough survey:
- Existing Ductwork: If existing ducts pass through the theater space, they must be insulated with R9 wrap and potentially sealed to prevent sound leakage.
- Noisy Mechanicals: Identify and fix or relocate any noisy water pipes, drains, or other mechanicals that would otherwise be isolated by the theater's soundproofing. Ensure they are accessible for future maintenance.
- Equipment Location: Plan locations for new dedicated HVAC equipment (compressor unit, air handler) that are remote enough to ensure quiet operation.
4. Ductwork Design is Paramount
This is where much of the quiet operation is achieved (or lost).
- Large & Lined: New ductwork should be generously sized to maintain low air velocities at peak volume and heavily lined internally with acoustic material.
- Supply Duct Work: Must distribute air evenly to prevent drafts or hot/cold spots.
- Return Duct Work: Equally important for drawing air efficiently. It should also be large with multiple bends to prevent noise from traveling back to the air handler or outside.
- Static Pressure: The air moving equipment (air handler) must be correctly matched to the static pressure created by these "quiet ducts" to ensure proper airflow and avoid straining the system.
- Aesthetic Registers: Grilles must be integrated beautifully without compromising airflow or sound design. Their positioning is critical to avoid acoustic reflections.
5. IAQ: The Fresh Air Imperative
You can’t just recirculate stale air.
- Outdoor Fresh Air Intake: The simplest method is to introduce outdoor air into the return side of your dedicated HVAC system through a bird-screened vent with a weighted back-draft damper. This ensures the air is filtered and conditioned.
- Best Design: Heat Recovery Ventilator (HRV) or Energy Recovery Ventilator (ERV): This is the gold standard. HRVs/ERVs:
- Actively exhaust stale indoor air while introducing fresh outdoor air.
- Exchange heat/energy between the two airstreams, reducing the load on your HVAC system.
- Provide filtered, tempered fresh air.
- Can operate independently of the main HVAC system, ensuring fresh air even when heating/cooling isn't active.
- Some can include reheat units for colder climates.
6. Smart System Control
The final piece of the puzzle is an intuitive and responsive control system.
- Digital Thermostat: Choose a digital thermostat with a small "dead band" (+/- 1°F) to maintain tight temperature control.
- Auto System Changeover: The thermostat should automatically switch between heating and cooling as needed.
- Thermostat Placement: Critical for accurate readings. Avoid placing it near supply vents, heat sources, or in direct sunlight. Consider placement within the return air path for a more accurate average room temperature reading.
- Whole-House Integration: If integrating with a larger smart home system, ensure compatibility and that the home automation doesn't override critical theater HVAC settings. High-end HVAC systems often require their specific, proprietary thermostats.
Common Questions and Smart Answers
Navigating home theater ventilation can raise a few eyebrows. Let's clear up some common concerns.
"Can I just use my house's central AC for my home theater?"
While technically possible, it's highly not recommended for a dedicated theater. Central AC rarely provides the specific, quiet, and rapid response cooling needed for a sealed, equipment-heavy room. Shared ductwork inevitably leads to sound leakage and inconsistent temperatures, compromising both your audio experience and equipment longevity. A dedicated, independent system is the optimal choice.
"How do I know what CFM I need for my equipment?"
A rough guideline for equipment cabinets is to aim for 1-2 CFM per cubic foot of cabinet volume, but this is a starting point. For high-heat components like powerful amplifiers, you might need 50-100 CFM per component. The best approach is to estimate the total BTU output of your gear (manufacturers often provide this) and then size the fans accordingly. When in doubt, slightly overestimate CFM or opt for a multi-speed fan system that can be adjusted.
"What about soundproofing—won't ventilation negate that?"
Not if designed correctly! Proper home theater ventilation solutions are built into the soundproofing strategy. This means using lined, baffled ducts, remote fan units, isolation mounts, and carefully designed sound-attenuating registers. The goal is to isolate the sound of the ventilation system from the theater space while still allowing air to flow freely. Integrated design is key; don't add ventilation as an afterthought to a soundproofed room.
"Are small USB fans enough for my setup?"
For a single, low-heat component (like a Blu-ray player or a small media streamer) sitting in an open-backed cabinet, a small USB fan might be sufficient. However, for multiple components, powerful receivers, or enclosed cabinets, you'll need a more robust system with higher CFM and often a multi-fan setup. Think of USB fans as spot-cooling, not comprehensive cabinet ventilation.
"Where should I place my supply and return vents in the room?"
For optimal air circulation and comfort in a home theater, supply vents are often best placed high on the walls or ceiling, near the front of the room, to gently shower conditioned air into the space. Return vents should be placed low on the walls, ideally near the back or sides, to draw out cooler, denser air (and capture heat generated by occupants and lower equipment) efficiently. This creates a gentle, full-room air turnover without creating drafts. For equipment cabinets, intake low, exhaust high.
Your Ventilation Blueprint: Next Steps to a Cooler, Quieter Theater
Now that you understand the critical role of ventilation, it's time to put that knowledge into action.
1. Assess Your Current Needs
- Equipment Audit: List all your AV components. Which ones run hot? Are they in open air, a cabinet, or a rack?
- Room Assessment: Is your theater sealed? How many people typically use it? Do you notice stuffiness or temperature fluctuations?
- Budget Reality: What's your budget for ventilation? Component cooling kits are less expensive than a full dedicated HVAC system, but both offer crucial benefits.
2. Prioritize & Plan
- Start with Equipment: This is often the most immediate and critical need. Research specific cabinet/rack fan systems based on the factors discussed.
- Consider Whole-Room HVAC for New Builds/Major Renovations: If you're building a new theater or doing a significant renovation, this is the ideal time to integrate a dedicated HVAC system from the ground up.
- Consult Professionals: For comprehensive HVAC design, especially involving fresh air and ductwork, a qualified HVAC engineer experienced in acoustically sensitive environments is invaluable. For complex rack setups, an AV integrator might offer specialized cooling solutions.
3. Don't Forget Maintenance
- Clean Filters: Regularly clean or replace filters in both your equipment fans and the room HVAC system to maintain airflow and air quality.
- Clear Obstructions: Ensure fan intakes and exhausts are never blocked.
- Monitor Temperatures: If your system has a thermostat, keep an eye on temperature readings, especially during long viewing sessions or intense use.
The ultimate home theater experience isn't just about what you see and hear; it's about what you feel—and don't feel. By prioritizing thoughtful and effective home theater ventilation solutions, you're not just protecting your investment; you're elevating every single moment spent in your dedicated entertainment haven, ensuring unparalleled comfort and performance for years to come.